Dale writes:
![]() My application requires that I measure the areas of various land use types within a given project area. I had problems when I tried to append a particular shape of one land use to another shape of a different land use. I had to leave a gap to keep things from getting messy. I think I have that issue resolved by assigning each land use type to a different layer. I also had problems when I placed a node off location. I could not find a way to ‘grab’ the node and move it to the correct location (feature request). Deleting the shape and re-drawing it is a pain.
My application requires that I measure the areas of various land use types within a given project area. I had problems when I tried to append a particular shape of one land use to another shape of a different land use. I had to leave a gap to keep things from getting messy. I think I have that issue resolved by assigning each land use type to a different layer. I also had problems when I placed a node off location. I could not find a way to ‘grab’ the node and move it to the correct location (feature request). Deleting the shape and re-drawing it is a pain.![]()

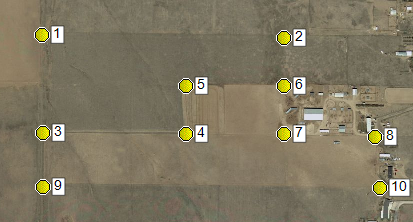
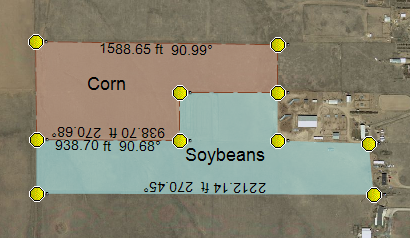
There are a couple techniques you can use if you are drawing filled objects that need to mesh right up against each other. If they have straight sides (not curved like a river centerline), it might be easiest to draw them using the route tool, and then convert the routes to shapes after. This is because the route tool automatically snaps to waypoints as you draw. So if you are drawing agricultural fields, and put waypoints at all of the field boundaries, as you use the route tool to “connect the dots” you’ll get routes that align perfectly with the adjacent fields.
As you begin to draw a new route, ExpertGPS might show a + cursor, meaning that is going to extend an existing route. If this isn’t what you want, hold SHIFT to override this.
You can move nodes to a new position by selecting the waypoint at that node and using the Move Selected tool to move it to a new position.

Once you’ve got everything in place, select the routes and click Convert to Shape on the Tools menu. You can then delete the routes and waypoints.
If you need to make changes to shapes, it’s possible to do so. Click once with the select tool to select the shape, and then drag a selection rectangle over the node you want to move. It should be highlighted in magenta. Now switch to the Move Selected tool and drag to the new location.


